Sealing attic vents is a crucial task for homeowners and real estate developers who want to maintain an energy-efficient and comfortable home environment. In this article, we’ll explore the steps and considerations involved in effectively sealing attic vents. This process can help in reducing energy costs, improving indoor air quality, and preserving the structural integrity of your home.

Why Seal Attic Vents?
Attic vents play a vital role in maintaining the ventilation of your home. However, improper sealing can lead to air leaks, causing increased energy consumption and discomfort. Sealing these vents properly ensures that your home remains energy-efficient and well-insulated, preventing unnecessary heat loss or gain.
Benefits of Sealing Attic Vents
Sealing attic vents can provide numerous benefits, including:
- Energy Efficiency: Proper sealing prevents air leakage, reducing the workload on your HVAC system and lowering energy bills.
- Improved Air Quality: Sealing prevents dust, allergens, and pollutants from entering your home.
- Enhanced Comfort: A well-sealed attic maintains consistent indoor temperatures, ensuring a comfortable living space.
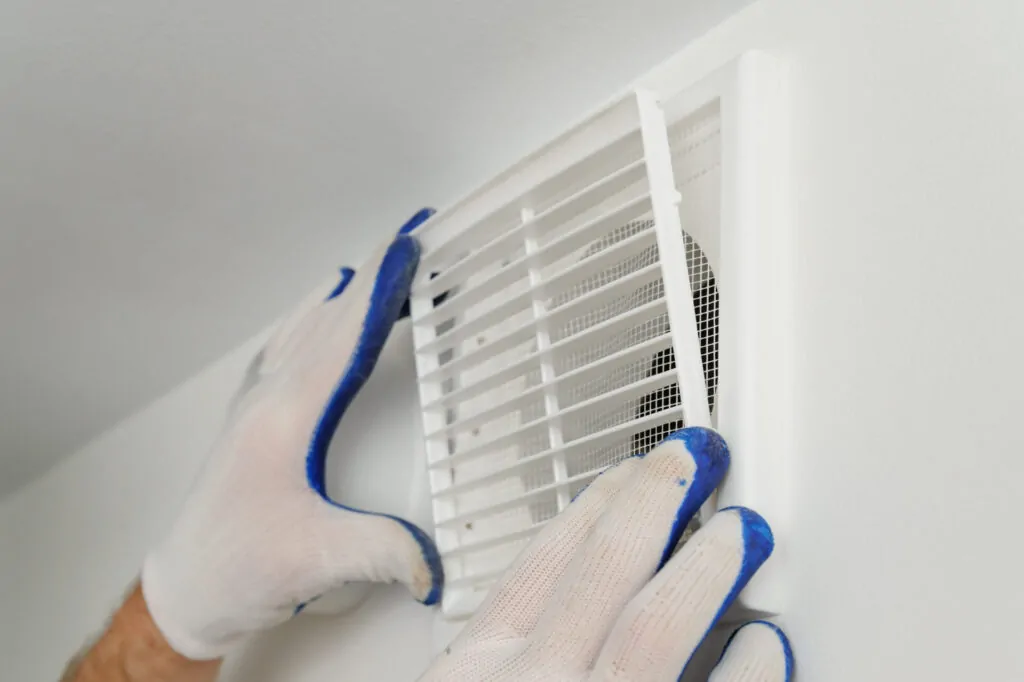
Steps to Seal Attic Vents
Before you begin, it’s essential to gather the necessary tools and materials. You will need weatherstripping, caulk, foam sealant, and a utility knife.
Step 1: Inspect the Attic
Conduct a thorough inspection of your attic to identify areas where air leakage may occur. Look for gaps or cracks around the vents and other attic components.
Step 2: Clean the Area
Before sealing, ensure that the area around the vents is clean and free of dust and debris. This will allow the sealant to adhere properly.
Step 3: Apply Weatherstripping
Use weatherstripping around the edges of the vents to create a tight seal. This is especially important for vents that are used occasionally, such as those near an attic home theater setup.
Step 4: Use Foam Sealant
For larger gaps and cracks, apply foam sealant to fill them. This type of sealant expands to fill spaces, ensuring no air can pass through.
Step 5: Caulk Around Vents
For smaller gaps, use caulk to seal around the edges of the vents. Smooth the caulk with a utility knife for a clean finish.
Common Mistakes to Avoid
While sealing attic vents, avoid these common mistakes:
- Ignoring Small Gaps: Even small gaps can lead to significant energy loss over time.
- Using Incorrect Sealant: Ensure you use the right type of sealant for your specific needs.
- Overlooking Ventilation Needs: Ensure that your attic remains properly ventilated to avoid moisture buildup, which can lead to mold and structural damage.
Maintaining Sealed Attic Vents
Once you’ve sealed your attic vents, regular maintenance is essential to ensure the seals remain effective. Check the seals annually and reapply sealant as needed.
Regular Inspections
Conduct regular inspections to ensure that the seals are intact and there are no signs of wear and tear.
Reapply Sealant
If any gaps or cracks reappear, reapply the appropriate sealant to maintain the energy efficiency of your home.
Further Resources
For more information on attic maintenance and improvement, consider visiting [this guide on attic ventilation](https://www.asphaltroofing.org/importance-proper-attic-ventilation-roofing-system/ ‘Importance of Proper Attic Ventilation’).

FAQ Section
Why is sealing attic vents important?
Sealing attic vents is important to prevent air leaks, reduce energy costs, and maintain a comfortable home environment.
Can I seal attic vents myself?
Yes, with the right tools and materials, sealing attic vents can be a DIY project. However, professional assistance is recommended for complex cases.
How often should I check the seals on my attic vents?
It’s recommended to check the seals annually and reapply sealant as needed to ensure they remain effective.
This article contains affiliate links. We may earn a commission at no extra cost to you.