

Introduction to Frost-Proof Outdoor Spigot Installation
As winter approaches, homeowners and real estate developers often face the challenge of preventing outdoor water fixtures from freezing. A crucial component in this endeavor is the frost-proof outdoor spigot installation. This simple yet effective installation ensures that your water supply remains intact and functional, even in freezing temperatures.
Installing a frost-proof outdoor spigot is not only a smart home improvement project but also a necessity for those living in colder climates. By understanding the importance and process of this installation, you can protect your plumbing system from costly repairs and maintain your homes water efficiency.
What is a Frost-Proof Outdoor Spigot?
A frost-proof outdoor spigot is designed to prevent water from freezing inside the pipes, which can lead to pipe bursts and significant water damage. Unlike traditional spigots, frost-proof models feature a longer stem that keeps the valve seat within the warmer interior of the home, preventing it from freezing.
Components of a Frost-Proof Spigot
- Shut-off Valve: Located inside the house to prevent freezing.
- Stem: Extended to keep the valve seat warm.
- Vacuum Breaker: Prevents backflow and contamination.
Why Choose a Frost-Proof Spigot?
Choosing to install a frost-proof spigot offers numerous benefits. It provides peace of mind knowing that your outdoor water fixtures are safe from the harsh winter elements. Additionally, it reduces maintenance costs by avoiding potential pipe bursts and subsequent water damage.
For those interested in enhancing their home’s plumbing efficiency, consider exploring Eco-friendly options that can work in tandem with frost-proof installations for an even greater impact.
Step-by-Step Frost-Proof Outdoor Spigot Installation
1. Gather Necessary Tools and Materials
Before beginning the installation, ensure you have the necessary tools and materials. These include:
- Frost-proof spigot
- Pipe wrench
- Teflon tape
- Drill and bits
- Pipe cutter
2. Turn Off the Water Supply
Locate the main water valve in your home and turn it off to prevent any water flow during installation. This step is crucial to avoid any water-related mishaps.
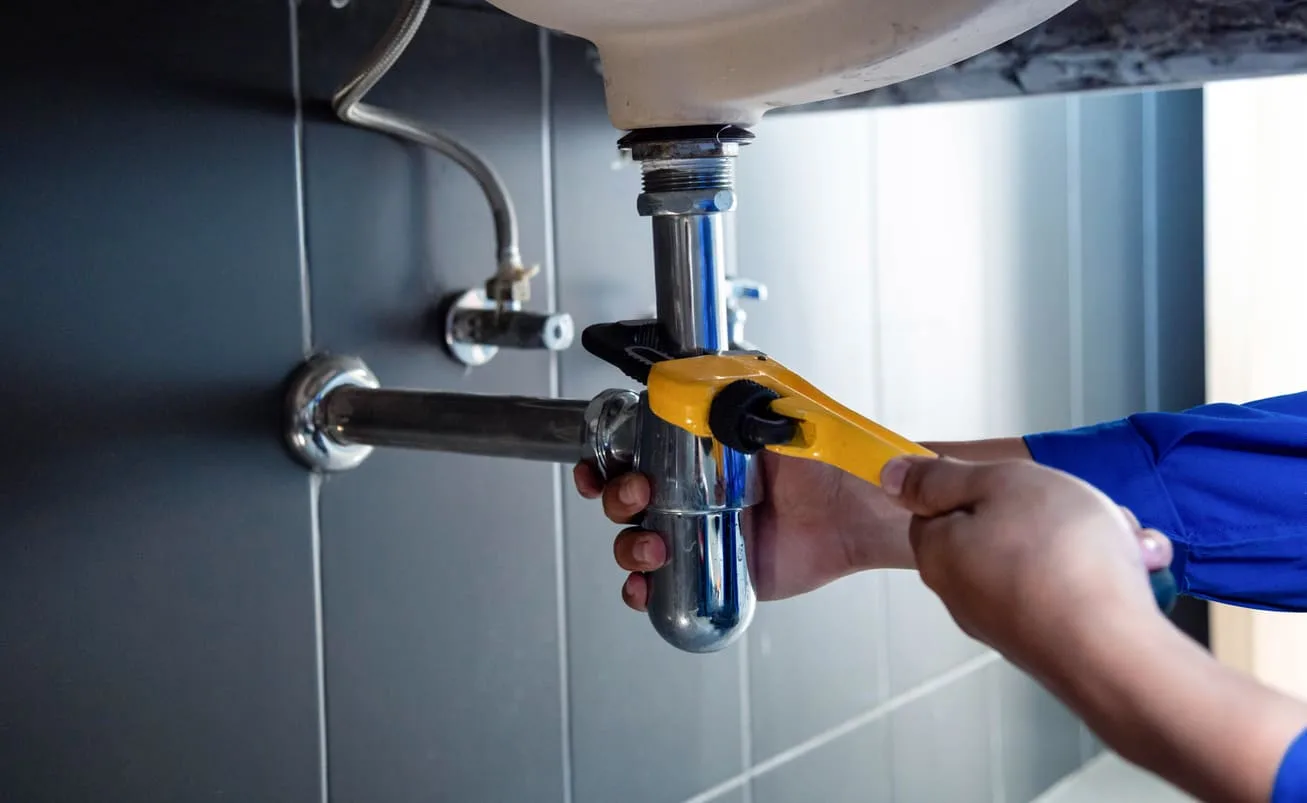
3. Remove the Existing Spigot
Using a pipe wrench, carefully remove the old spigot. If the spigot is difficult to remove, apply some penetrating oil to loosen it.
4. Prepare the Pipe
Once the old spigot is removed, clean the pipe threads and wrap them with Teflon tape. This ensures a tight seal and prevents any leaks.
5. Install the Frost-Proof Spigot
Attach the new frost-proof spigot to the pipe, ensuring it is tight and secure. Use a pipe wrench to tighten the connection, but be careful not to over-tighten.
6. Test the Installation
After the spigot is installed, turn the water supply back on and check for leaks. Open the spigot to ensure water flows correctly and the installation is successful.
Additional Tips for a Successful Installation
When installing a frost-proof spigot, it is important to also consider other plumbing improvements. For instance, you might look into a whole house filtration system to enhance your water quality overall.
Regular maintenance and inspection of your outdoor plumbing fixtures can prevent potential issues. Following these plumbing maintenance tips can help keep your system in good condition.
Common Mistakes to Avoid
Even with the best intentions, mistakes can happen during installation. Here are some common ones to watch out for:
- Not turning off the water supply completely.
- Over-tightening the spigot, which can damage threads.
- Neglecting to use Teflon tape, leading to leaks.
Benefits of Professional Installation
If youre unsure about handling the installation yourself, consider hiring a professional. Professional plumbers have the expertise to ensure the job is done correctly and efficiently, saving you time and potential headaches.
Explore more about professional plumbing services and find the right solution for your home by visiting this comprehensive guide.
Conclusion
Investing in a frost-proof outdoor spigot installation is a proactive approach to safeguarding your homes plumbing during the winter months. Not only does it prevent costly damage, but it also enhances your homes overall efficiency. Whether you choose to tackle the installation yourself or hire a professional, the benefits are undeniable.

Frequently Asked Questions
What is the main advantage of a frost-proof spigot?
The primary advantage is its ability to prevent pipe freezing and bursting, saving you from expensive repairs.
Can I install a frost-proof spigot myself?
Yes, with the right tools and guidance, a DIY installation is possible, but professional services are recommended for optimal results.
How often should I inspect my outdoor spigot?
Regular inspections, at least once a year before winter, can help identify potential issues early.
This article contains affiliate links. We may earn a commission at no extra cost to you.

